Saturday 16 November 2013

Sheffield Maker Day

On the 9th of November a Maker Day took place at Sheffield Hallam University. I went along with the Sheffield Hackers and Makers user group.
I brought along my Pursa
Mendel but I also ran the Sheffield Hardware Hackers and Makers Mendel 90. Although my purse Mendel is not yet complete (but close to being though!) I still brought it along to show to people.

The Mendel 90 was being driven by a Raspberry Pi. The Pi had print run installed on it, this way I had full control over the printer just as I would if I was using a desk top computer. The printer was printing a small android fridge magnet test pice. The slicer settings still needed setting up on the Pi but I still ran a G code file on it.

The Mendel 90 being driven by a Raspberry Pi
The collection of 3D printers the group had on display
The Printer Printing
The Raspberry Pi

Thursday 1 August 2013

Working at Pimoroni

In July I spent a week doing work experience at Pimoroni. In this week I learnt many things like laser cutting, using a pick and place machine and much more.

I found the week that I spent there to be very useful and interesting, as well as learning many new skills. Throughout my time being there I felt very welcome and would like to thank all of the staff there for their help and endless encouragement. On top of this at the end of the week I was very kindly given a bag with Raspberry Pi products/accessories in it. Complete with a Raspberry Pi and a Pi Bow with my name engraved on it alongside a prototype of the Pi Glow.

I can't say thanks enough to Paul and everyone at pimoroni for looking after me and teaching me so much during my week placement. You guys are the best, Thankyou!


Wednesday 6 February 2013

Extruder assembled

With the hot end assembled, I have used the notes of of the reprap site. This as seen in the top picture shows the set up of it. With the cables being crimped of. I also used a bit of solder to reinforce it


It's been a long time...

It has been a while since I last posted... Since this time I have been very busy working on my machine. I have tided up all of the wiring, and sorted out a power source. Also I have replaced the normal M3 bolts on the bottom of the bed for nylon lockable nuts. This means that the bolts will not loosen easily. As previously I found that when transporting my machine the nuts can easily loosen themselves off the bottom of the bed. I have also added X4 stepper motor drivers to the machine.


Tuesday 10 April 2012

Assembling the X axis

Parts for the X axis
The Finnish product
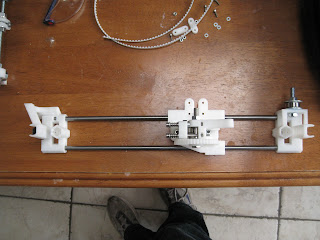
The X axis where the next thing to be assembled. Once one of the ends had gone on with a little force, the filament feeder was added, then the over side to the assembly. Along with one side of the pulley.

Sunday 8 April 2012

Assembling the filament feeder

The filament feeder kit was assembled together with all of the parts


 The Finished product!

At first i had trouble finding instructions on how to assemble this part but eventually I figured out how to assemble it myself.


 The Y axis smooth rod mounts where then all align so that the print bed would align properly


The print surface slid on straight away!